Showing posts with label Upcycling. Show all posts

Wednesday, October 31, 2012

Happy Halloween

This year I was pretty unprepared for Halloween. I just got back from visiting my mom and sister in NJ/NY on Saturday and then Hurricane Sandy/Frankenstorm happened on Monday. We weren't affected except for some high winds, but my family and friends in the Northeast were definitely affected. Some were fine with power but fairly locked in because of mass transit shutdowns and others had no electricity, water, or cell service. Fortunately, they all survived without severe damage to their health, cars, or home, though they all knew someone or lived in a neighborhood where someone wasn't so lucky.

I was encouraged to hear that, despite this, there was still a strong desire to still celebrate Halloween. One friend said that not only was it community bonding during difficult times but it's also a pleasant distraction that's fun for the kids. Besides, he added, all the candy was bought a while ago (as a fellow mom, I totally relate to this as one who tends to be well-stocked for Halloween way before the event). This totally motivated me to put something together--Frankenstorm wasn't going to be the Grinch of Halloween, after all.

I went to Goodwill last night and spent $8 on these items:


with a goal to become the Sun Drop soda girl:


I didn't hold out too much hope that I'd find a blank green ringer tee, but I did find light and dark green t-shirts that I just layered.  I found the Sun Drop logo on the internet, printed it out on iron-on paper, and ironed it on the light green shirt.  I took scissors to the Mom Jeans, which I turned into the cutoffs.  I trimmed off the toes of the red socks to make into leg warmers.  For the red head band, I cut up the toddler tights and put a few stitches in to make a loop.  I had black tights and I just went with sneakers that I had with green trim and hope it wouldn't be a big deal not to have red sneakers.  Ta da!


Besides my annual trip to Starbucks for my favorite autumn drink--the pumpkin spice soy latte--I hit Earth Fare.  I had an impromptu conversation with a lady on vegan yogurts and she never mentioned my costume, which vaguely made me wonder if she thought I was dressed as I normally do.  Which is kind of awesome, right?


The topper was coming in 2nd place (to a killer Fierce Five 2012 USA women's gymnastics team) at the costume contest at work.


And I was able to squeeze in carving our traditional barfing Jack O'Lantern:


Hope everyone had a happy Halloween!

Monday, March 12, 2012

Stitch by Stitch: Machine appliqué tee

Recently, I picked up "Stitch by Stitch: Learning to Sew, One Project at a Time" by Deborah Moebes.  It's a book designed for those who want to learn how to sew.  I know elementary sewing and built some basic skills by experience and trial & error, but I've been kind of wanting to re-learn sewing a touch more formally to cover some fundamental techniques that I missed.  I also wanted to get out of my comfort zone and learn skills that I don't normally think of needing to know, like mitering corners. 


One of the first lessons in the book which I would have glossed over but glad I actually did was a stitch sampler:


The basic gist is trying out and getting comfortable with all the stitches your machine is capable of and playing around with various lengths and widths.  It was really enlightening to get a feel for the other stitches my machine does, though frankly, I think most of the others are decorative, not practical.  But apparently my machine does some kind of blind hemming which I'm hoping really comes in handy later.  I also got familiar with sewing buttonholes--though I find the idea of making clothes requiring buttonholes really daunting...for now.

To help get familiar with the zig-zag stitch, or more specifically, the satin stitch, which is a zig-zag stitch where the stitch width is wide, but the stitch length is short, there was this mini-project, a machine appliqué tee:


A perfect project because I had a t-shirt that needed some zipping up because its plain color was a bit blah on me. And I had these adorable sushi pajamas that Paul gifted me a while ago where I loved the print but the fit wasn't that comfortable and I wasn't using them. Upcycle Heaven!


I cut a some material from the sleeve and per the lesson, I ironed on fusible webbing, which pretty much makes any material an iron-on.  Fusible webbing comes on these rolls and there is a textured side and a paper-backed side.  I cut a piece large enough for my project and ironed the textured side to the wrong side of my fabric piece.  A lesson learned here is make sure that the fabric is ironed smooth before ironing on the fusible webbing--once the fusible webbing is on you won't be able to iron it out any smoother.

I cut a simple heart stencil from a magazine cover and traced it on to the paper side of the material:


I cut out the heart and peeled off the paper and ironed it to the front of the shirt:


In some ways, one could finish here and leave it the way it is but it looked a bit unfinished so I stuck with the project and decided to satin stitch around it.  To make that easier, I pinned tear-away stabilizer on the inside of the shirt, behind the heart applique.  Stabilizer makes it easier to sew short length stitches (like this satin stitch) with knit material by temporarily attaching it to non-stretch material to make it easier to feed through the sewing machine (and not get jammed up because the knit alone can just stretch and gets stuck under the needle).  The book recommends iron-on (tear away) stabilizer but the store was out so I had to use the kind where you have to pin it, which wasn't too bad to use, but I plan on getting the iron-on kind next time.

I centered my foot right on the edge of the heart so that my satin stitch would evenly get both the heart and t-shirt and I sewed on the right side of the shirt/heart.


Another lesson learned:  With a heart path, I recommend practicing on spare material beforehand.  The point and divot of the heart are a little wonky because I wasn't quite sure when to pivot the material and would have liked to have a bit of experience doing it before my actual project. 


Then the last steps are just to tear away the stabilizer--both from the outside of the heart and inside.


And ta-da!


A great way to jazz up a plain tee:


Even with the slight stitching mishaps (which I like to think are imperfections that make home-made crafting charming), my teen daughter still thought it was cool enough that she wanted to wear it. High praise, right?

As an "experienced beginner", I highly recommend this book to anyone interested in filling in the blanks of skills and techniques that one might have skipped along the way. I'm really looking forward to continuing with other lessons in this book and see what other cool things I can sew and better my sewing technique.

Saturday, February 25, 2012

Re-sizing an awesome T-shirt that's too large

I found this awesome t-shirt at the Goodwill for $2. Besides the nostalgia factor and having one of my favorite foods emblazoned on my chest like an eating superhero, the letters were appliqued felt. Too charming! But also, too large:


So I decided to trim it down and create a better fitting t-shirt with the help of this tutorial from Trashion.  Since it was my first time, I definitely learned a couple of things along the way.  First I turned it inside out and trimmed the sleeves off:


I used a smaller, better-fitting t-shirt as my pattern.  First thing I learned--use a t-shirt made of similar material and stretch as your pattern shirt.  The shirt I used as my pattern shirt had considerable more stretch and well, at the end, I realized I should have made bigger seam allowances since my XL shirt didn't have as much stretch.  More on this later.  Anyhoo using the pattern shirt, I trimmed down the sides following the pattern shirt seams as guidelines.  I cut a healthy 1/4" around it.  I have a long torso so I kept the original length but if I didn't I would have trimmed up the hem as well:


I pinned the sides up to get it ready for stitching it together (right sides were already together since I had turned it inside out from the beginning):


And here's the second thing I learned.  With knit fabric, one is supposed to use a zig-zag stitch rather than a straight stitch to allow for the stretch.  I really hadn't sewn knit fabric before so I did some test stitching on the scraps.  Holy cow--thank goodness I did.  I switched the dial to the zig-zag and left the stitch length at 1.  When I started sewing, as much as I tried to not stretch the material, it was getting stretched and creating a "lettuce edge" which is apparently a decorative hem finish but not good for seams inside clothing.  So I switched the stitch length to 2 and it making a much flatter seam:


Here's a close-up of the transition of the switching the stitch length from 1 to 2 and the difference in the lay of the seam for the two.  So my lesson learned--either get real familiar with your zig-zag stitch or do a test run on scraps before sewing the actual project.


Next it was time to re-size the sleeves that I cut off at the beginning.  I lined up the sleeve hems with my pattern shirt:


Then flipped over the pattern shirt at the seam so I knew where to trim down the sleeve piece:


I trimmed it out with an additional 1/4" for the seam allowance:


I stitched up the bottom of the sleeve first than aligned the armhole seam to the shirt.:


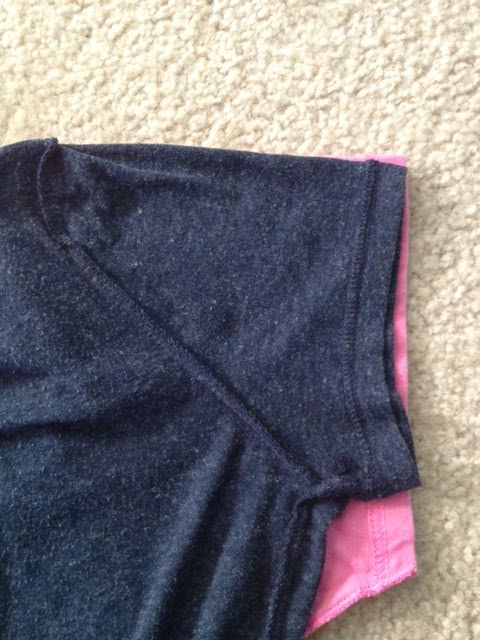
I turned the sleeve right side out and inserted it inside the shirt (rights are together).  And stitched along the armhole.  Unfortunately, I made have made a mis-step somewhere in my trimming because on one of the sleeves the amount of material between the sleeve and the shirt body did not match and I had to scrunch or mini-pleat it to make the material match up. 


And here was the last lesson I learned.  It's just a t-shirt.  This isn't a wedding dress, it's a used shirt I got at the Goodwill.  Little mistakes aren't really a big deal and just learning lessons and practice along the way.

And ta-da:  a more fitted t-shirt!


Here's a quick comparison of before and after:


Okay, so back to the first lesson--the material on this shirt wasn't nearly as loose and stretchy as my pattern shirt so it has a bit more of a strained look to it at the chest, gut, and hips.

So on to the last lesson--it's just a t-shirt.  One that fit my slimmer, middle-school daughter much better.


So some practice down and some lessons learned--definitely looking forward to re-sizing another shirt.

Friday, February 10, 2012

Mad for Plaid

On a visit to Target, I was drawn to this plaid Duck Tape:


There were other colors and styles like animal prints ( and even themes like Hello Kitty) which kind of got me thinking about the craftier side of duct tape.  I remember a while back seeing posts about kids who went to their proms in duct taped outfits and currently, Duck Tape even has contests for it.  So when I got these boots on a trip to the Goodwill while visiting my mom, I realized I had a project.  They were the perfect candidate as some of the original pleather was scratched off in places:


And they ended up like this.


Interested?

I googled around and came across great posts about such a project here, here, and this great tutorial by Crafting in the Rain here.  Anyhoo, I ran into one major issue: matching the plaid exactly was not possible due to the way the pattern is printed on the tape.  So I focused on syncing the broad purple lines as much as possible:


As I was using a pair of somewhat dull scissors of my mom's that got stickier as I cut more tape, I found it advantageous to work as much length as possible to prevent tearing the tape (due to cutting with dull scissors) and pattern consistency: 


Be sure to press the tape into all the wrinkles of the boot by pressing outward with a hand inside the boot and pressing the tape into the wrinkles with the other hand on the outside of the boot.  When I was able to lay the pieces evenly next to each other, it didn't look too bad:


The hard part was hitting the curves, where the tape can't just be laid side by side in rows:


So I would fill the blank spaces with shorter pieces of duct tape trying to sync the purple lines as best I could.  I also made a boundary near the bottom edge with little pieces of duct tape so that when I cut the bottom edges of the long strips roughly with the scissors, the boundary would keep the bottom edge looking clean:


Unfortunately it was really challenging to match even just the purple lines around the bottom curve, so the bottom part of the boot definitely has a more collagy look.


Well they may not be perfect, but they lend a fun accent to simple jeans, don't you think?


This project took less about two hours so I give a thumbs up on the fun plaid Duck Tape for this upcycled boot project.  Anybody else have ideas of what I else should duct tape?