

So I decided to trim it down and create a better fitting t-shirt with the help of this tutorial from Trashion. Since it was my first time, I definitely learned a couple of things along the way. First I turned it inside out and trimmed the sleeves off:

I used a smaller, better-fitting t-shirt as my pattern. First thing I learned--use a t-shirt made of similar material and stretch as your pattern shirt. The shirt I used as my pattern shirt had considerable more stretch and well, at the end, I realized I should have made bigger seam allowances since my XL shirt didn't have as much stretch. More on this later. Anyhoo using the pattern shirt, I trimmed down the sides following the pattern shirt seams as guidelines. I cut a healthy 1/4" around it. I have a long torso so I kept the original length but if I didn't I would have trimmed up the hem as well:

I pinned the sides up to get it ready for stitching it together (right sides were already together since I had turned it inside out from the beginning):

And here's the second thing I learned. With knit fabric, one is supposed to use a zig-zag stitch rather than a straight stitch to allow for the stretch. I really hadn't sewn knit fabric before so I did some test stitching on the scraps. Holy cow--thank goodness I did. I switched the dial to the zig-zag and left the stitch length at 1. When I started sewing, as much as I tried to not stretch the material, it was getting stretched and creating a "lettuce edge" which is apparently a decorative hem finish but not good for seams inside clothing. So I switched the stitch length to 2 and it making a much flatter seam:

Here's a close-up of the transition of the switching the stitch length from 1 to 2 and the difference in the lay of the seam for the two. So my lesson learned--either get real familiar with your zig-zag stitch or do a test run on scraps before sewing the actual project.

Next it was time to re-size the sleeves that I cut off at the beginning. I lined up the sleeve hems with my pattern shirt:
Then flipped over the pattern shirt at the seam so I knew where to trim down the sleeve piece:

I trimmed it out with an additional 1/4" for the seam allowance:

I stitched up the bottom of the sleeve first than aligned the armhole seam to the shirt.:

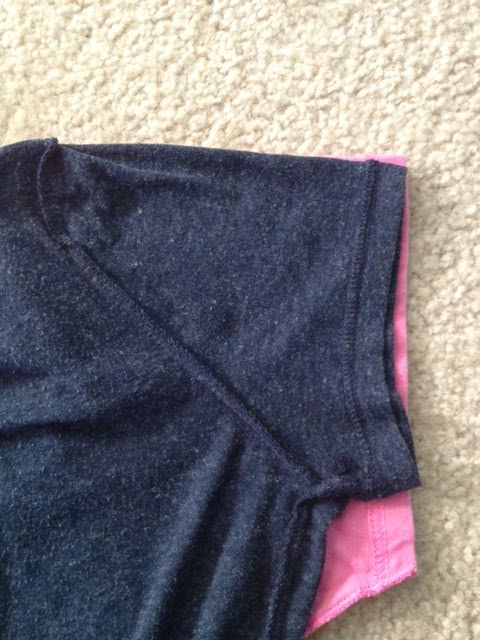
I turned the sleeve right side out and inserted it inside the shirt (rights are together). And stitched along the armhole. Unfortunately, I made have made a mis-step somewhere in my trimming because on one of the sleeves the amount of material between the sleeve and the shirt body did not match and I had to scrunch or mini-pleat it to make the material match up.

And here was the last lesson I learned. It's just a t-shirt. This isn't a wedding dress, it's a used shirt I got at the Goodwill. Little mistakes aren't really a big deal and just learning lessons and practice along the way.
And ta-da: a more fitted t-shirt!

Here's a quick comparison of before and after:

Okay, so back to the first lesson--the material on this shirt wasn't nearly as loose and stretchy as my pattern shirt so it has a bit more of a strained look to it at the chest, gut, and hips.
So on to the last lesson--it's just a t-shirt. One that fit my slimmer, middle-school daughter much better.

So some practice down and some lessons learned--definitely looking forward to re-sizing another shirt.
This comment has been removed by the author.
ReplyDelete